Have you ever looked at elegant handwritten notes and wished your own penmanship had that same graceful flow? It's a common feeling, you know, especially when it comes to something as fundamental as the letter 'i' in cursive. For many, that little loop and dot can seem a bit tricky at first, but honestly, it holds the key to unlocking a whole world of neat writing.
There's a real charm to cursive, isn't there? It's more than just writing; it's a way to connect with a classic skill, and it can be pretty relaxing, too. So, if you're keen on making your handwriting look a bit more polished, focusing on the letter 'i' is actually a really good place to start. It's a foundational stroke, and getting it right really helps with other letters.
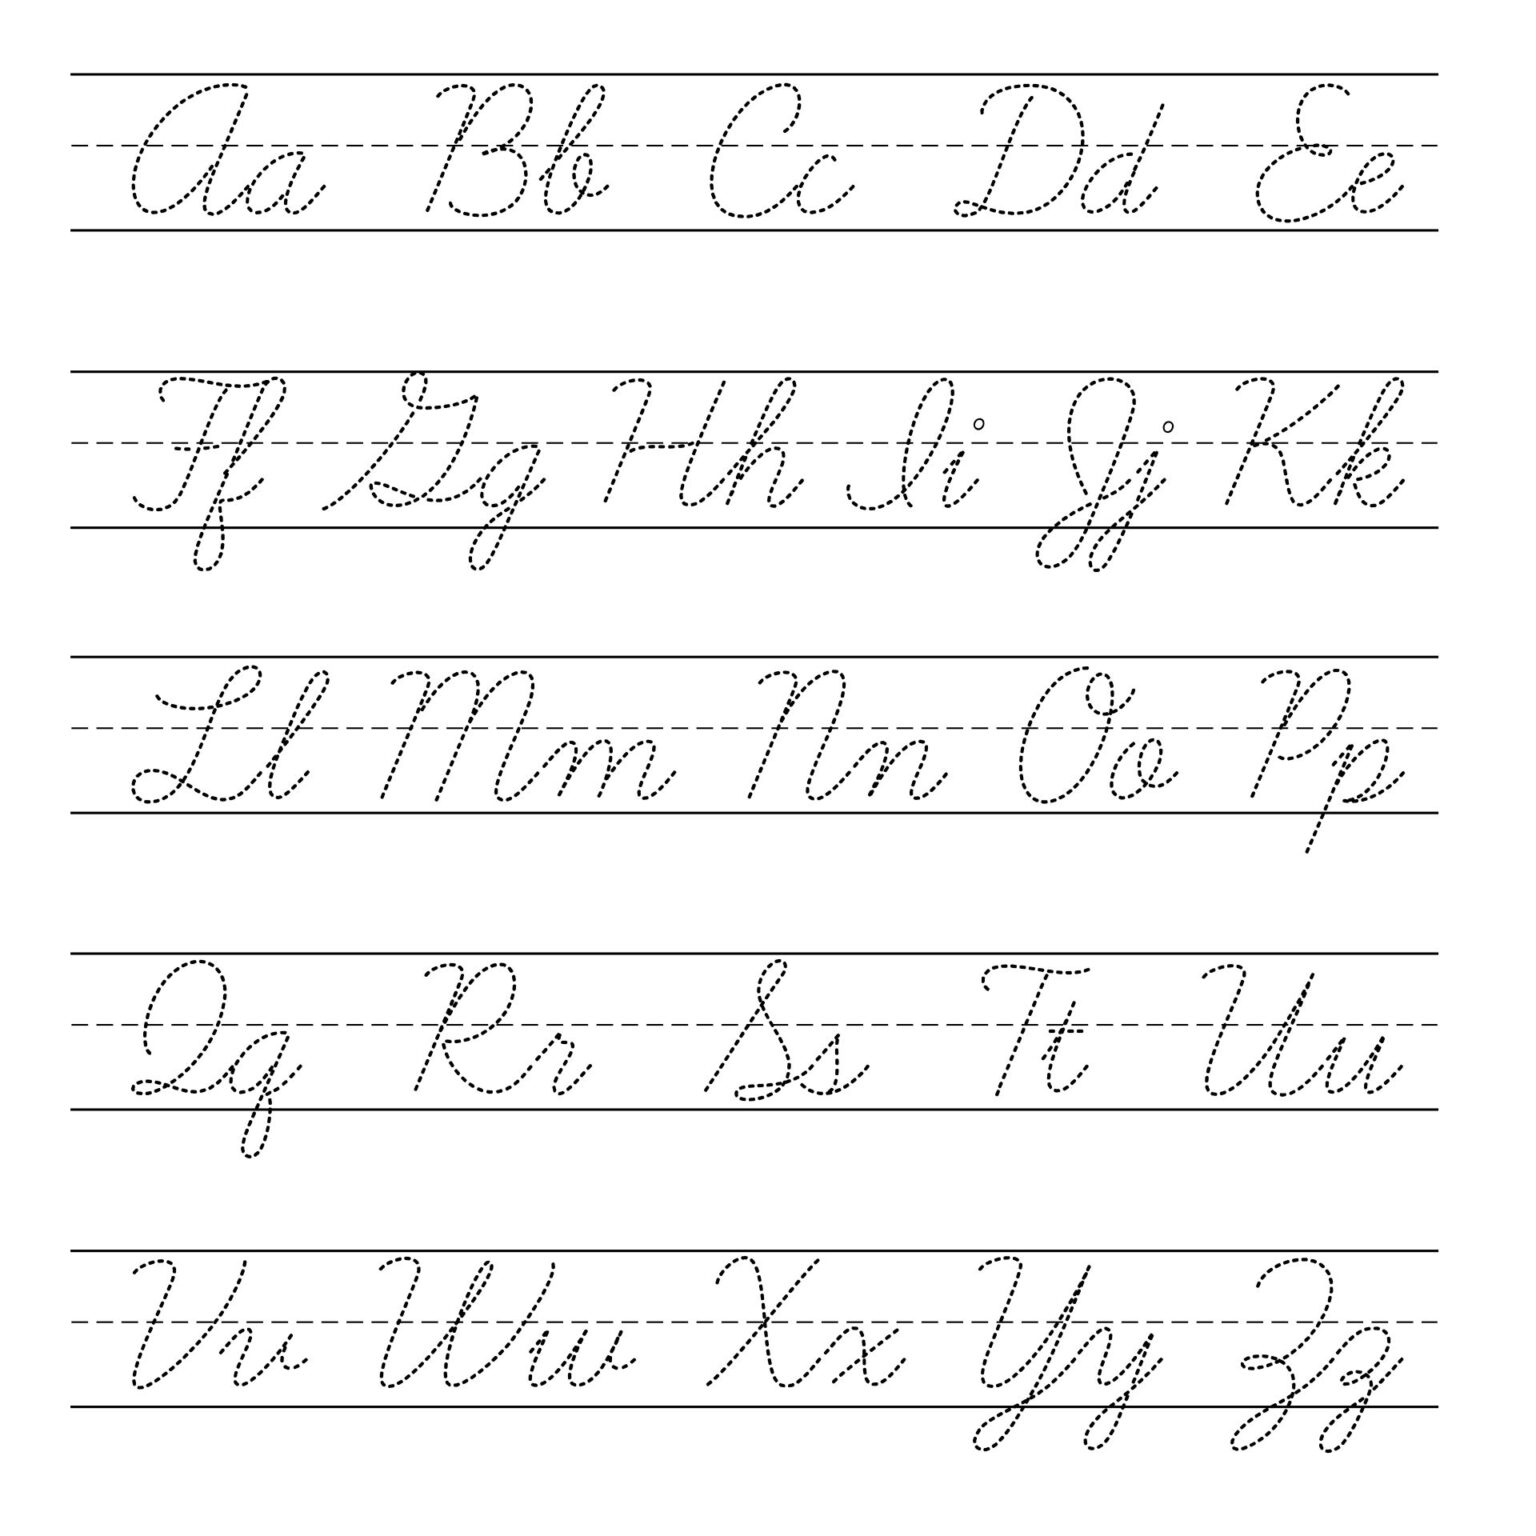
This guide, you see, is all about helping you get comfortable with the cursive 'i'. We'll explore how to form it properly, both the uppercase and lowercase versions, and even show you how to connect it with other letters. You'll find resources here that really make learning easy, like worksheets and step-by-step directions. It's almost like having a personal handwriting coach.
Table of Contents
- The Magic of the Cursive 'i'
- Getting Started: Your Comprehensive Guide to Cursive 'i'
- Practice Makes Perfect: Free Worksheets and Tools
- Connecting Letters: Building Words with 'i'
- Beyond the Pen: Digital Cursive Resources
- Frequently Asked Questions About Cursive
- Your Next Steps in Cursive Writing
The Magic of the Cursive 'i'
Learning to write well in cursive is, in a way, like learning a new language for your hand. It's about rhythm and connection, you know? The letter 'i' in cursive is a pretty neat example of this. It's often one of the first letters people learn, and getting it down really sets the stage for smoother, more connected writing. It's a small letter, but it carries a lot of weight in the overall look of your handwriting, honestly.
Even though we type a lot these days, there's been a growing interest in bringing back traditional skills, and handwriting is definitely one of them. It's kind of a quiet trend, if you think about it. People are finding joy in putting pen to paper again, and it’s a wonderful way to express yourself. This renewed appreciation for the written word makes learning something like the cursive 'i' feel really relevant and, well, pretty satisfying.
A well-formed cursive 'i' can make your notes look so much tidier and more pleasing to the eye. It's just a small part of the whole alphabet, yet it shows off your care and attention to detail. So, taking the time to truly understand how to write this particular letter, both its uppercase and lowercase forms, is a really worthwhile effort for anyone wanting to improve their handwriting, in some respects.
Getting Started: Your Comprehensive Guide to Cursive 'i'
When you're ready to pick up your pen and start forming that elegant 'i', having a clear guide makes all the difference. Our comprehensive approach helps you build a solid foundation. We've put together a tutorial that walks you through each step, making sure you get the hang of it properly. It's about understanding the flow, you see, rather than just copying a shape.
To really get a feel for the movement, watching someone write the letter can be incredibly helpful. We offer a short gif that shows both the uppercase and lowercase versions being formed. This visual aid, coupled with our written directions, gives you a pretty complete picture of the correct strokes. It's like watching a little mini-lesson right on your screen, which is rather convenient.
After you've watched the video or gif, trying it out on your own is the next logical step. The muscle memory starts to build as you practice, and that's where the real progress happens. You might find it a bit awkward at first, but stick with it. Each attempt brings you closer to that smooth, confident stroke, which is actually quite rewarding.
Crafting the Uppercase Cursive 'I'
The capital cursive 'I' has a distinct look, often starting with a graceful loop. Our guide helps you understand the starting point and the direction your pen should travel. It typically begins with an upward stroke, then curves around, and sweeps down before finishing with a small tail. It’s a bit like drawing a fancy ribbon, you know, in a way.
Using our cursive 'I' worksheet alongside the video provides a really strong base for learning this letter. The worksheet gives you lines and sometimes even dotted letters to trace, which helps your hand get used to the shape and size. This combination of seeing and doing is very effective for learning new movements, apparently.
Many people find that repeating the motion slowly at first, then gradually speeding up, really helps. Don't worry about perfection right away; just focus on getting the general shape and flow. You'll find that with each practice session, your capital 'I' will look more and more polished. It's a gradual process, but pretty satisfying.
Forming the Lowercase Cursive 'i'
The lowercase cursive 'i' is, in some respects, much simpler than its uppercase counterpart, but it's just as important for readable handwriting. It typically starts with a short upward stroke, then comes straight down, and finishes with a small tail that connects to the next letter. And, of course, there's that little dot above it, which is often added last.
Our tutorial for writing the cursive 'i' covers both the uppercase and lowercase versions, giving you a complete picture. The lowercase 'i' needs to be consistent in size and slant to fit well with other letters. You'll find that practicing its basic form makes it easier to join it with other letters later on, which is quite useful.
Just like with the capital 'I', using a worksheet specifically for the lowercase 'i' can be a huge help. It provides the right spacing and guides for your hand. You can practice making rows of 'i's, focusing on keeping them even and consistent. This repetitive practice really helps to solidify the movement in your mind and hand, you know.
Practice Makes Perfect: Free Worksheets and Tools
The secret to good handwriting, truly, is consistent practice. That's why having access to helpful tools, especially free ones, is so important. We've made sure to provide a variety of resources that can really enhance your handwriting, giving you plenty of chances to get things just right. It's like having a whole toolkit for improving your script.
You’ll find free printable cursive 'i' writing worksheets that you can use again and again. These sheets are designed to guide your hand and help you practice the correct strokes without needing to draw lines yourself. They're a fantastic starting point for anyone, whether you're just beginning or looking to refine your existing skills, which is pretty neat.
Beyond just the 'i', these worksheets are part of a larger collection. They are, in fact, one of 26 sets of cursive alphabet worksheets available, meaning you can move on to other letters once you're comfortable with 'i'. This systematic approach helps you build your cursive skills letter by letter, which is a really effective way to learn, if you ask me.
Printable Practice Sheets for All Learners
Our collection includes a range of free, printable cursive 'i' worksheets. These are super handy because you can print as many copies as you need, so you never run out of practice space. They typically feature lines to help with letter height and spacing, which are both crucial for neat cursive. It's a bit like having an endless supply of practice paper, you know.
These sheets are great for students, but honestly, anyone wanting to improve their handwriting can benefit. They allow you to practice writing the letter 'i' in both upper and lower case, focusing on getting the shape and flow just right. It's a simple, straightforward way to get those repetitions in, and repetitions are key for building muscle memory, apparently.
Having a physical worksheet to write on can make a big difference compared to just practicing on plain paper. The guides on the sheet help you maintain consistency, which is really important for developing good habits. You can really see your progress as you fill up the pages, which is quite encouraging, in some respects.
Tracing and Activity Pages for Fun Learning
To make learning even more engaging, our resources include not just basic practice sheets, but also cursive letter 'i' charts, tracing sheets, and activity pages. Tracing is a fantastic way to start, as it guides your hand through the correct motion before you try it on your own. It builds confidence and helps you feel the rhythm of the letter, which is pretty important.
The activity pages add a bit of fun to the learning process, making it less like a chore and more like a game. These might involve finding cursive 'i's or filling in missing letters, for example. Such activities keep things interesting and help reinforce what you're learning in a different way. It's about making the practice enjoyable, you see.
These varied sheets cater to different learning styles and keep the practice fresh. You can switch between tracing, freehand practice, and activities to keep your brain engaged. It's a pretty comprehensive set of tools designed to help you master the 'i' in cursive, whether you're a beginner or just looking for some extra practice, really.
Connecting Letters: Building Words with 'i'
Once you're comfortable with writing the individual cursive 'i' in both its forms, the next step is to see how it connects with other letters. Cursive is all about those smooth transitions between letters, after all. This is where your handwriting really starts to flow and look like proper script. It's a very satisfying part of the learning process, too.
Our materials help students practice not just writing the letter 'i' on its own, but also joining letters together. This is a crucial skill for forming words naturally. You'll learn how the tail of the 'i' leads directly into the next letter, creating a continuous line. It's almost like a dance between the letters, if you think about it.
By practicing these connections, you'll find that your writing becomes much more fluid and less choppy. This makes your cursive easier to read and, honestly, much more pleasant to look at. It's a small detail, but it makes a big difference in the overall appearance of your written words, you know.
Joining 'i' with Other Letters
We specifically guide you on how to join the letter 'i' with other common letters. For instance, you'll practice connecting 'i' with letters to form simple combinations like "in," "it," and "is." These are very common pairings, and getting them right builds a strong foundation for writing many different words. It's a pretty practical approach, actually.
The key is to maintain a consistent slant and spacing as you move from one letter to the next. The connecting stroke from the 'i' should flow smoothly into the beginning stroke of the following letter. This might take a little bit of practice, but you'll get the hang of it. You'll find that your hand starts to remember the movements, which is quite helpful.
By focusing on these specific letter joins, you're not just learning to connect, but also to maintain the overall rhythm of cursive writing. This helps you develop a consistent and readable style. It's a bit like learning scales on a musical instrument; you practice the small parts to master the whole piece, you know.
Simple Words to Practice
After practicing individual letter joins, the next natural step is to write simple words. Our materials encourage students to practice words like "ink," "ice," and "iron." These words are great because they use the 'i' in different positions and with various other letters, giving you varied practice. It's a good way to put your new skills to the test, honestly.
Writing full words helps you see how all the individual strokes and connections come together to form a cohesive unit. You'll pay attention to the spacing between letters within a word and the overall flow. This is where the magic of cursive really starts to shine through, as your individual letters transform into flowing words, which is pretty cool.
Don't be afraid to write these words multiple times. Repetition is your friend here. Each time you write "ink" or "ice," you're reinforcing the movements and making them more natural. You'll notice your hand becoming more confident and your words looking neater with every attempt. It's a very rewarding process, you know, seeing that improvement.
Beyond the Pen: Digital Cursive Resources
While the focus here is on handwriting, it's also worth noting that cursive has a place in the digital world too. Sometimes you might want to create a document or an image with a cursive look without actually writing it out by hand. This is where digital tools come in handy, and they're pretty straightforward to use, too.
You can generate cursive font simply by typing in text. This means you can type out a message, a quote, or anything you like, and have it appear in a beautiful cursive style. It's a quick way to get that elegant look for digital projects, presentations, or even just for fun. It's a very convenient option, in some respects.
These tools often come with a selection of different cursive handwriting fonts to choose from. You might find eight different styles, for example, each with its own unique flair. This allows you to pick the one that best suits your taste or the specific project you're working on. It's a bit like having a whole collection of different handwriting styles at your fingertips, you know.
Typing in Cursive Fonts
The process for typing in cursive fonts is usually very simple. You just type your text into a designated area, and the tool automatically converts it into a cursive script. There's no need for special software installation in many cases, as these tools
![Cursive Chart [Printable Cursive Alphabet Chart - Two Sizes]](https://mycursive.com/wp-content/uploads/2024/01/Cursive-Chart-1086x1536.jpg)