Graduation day is a monumental milestone, a culmination of years of hard work, dedication, and growth. As you prepare to walk across that stage, every detail counts in making the moment uniquely yours. One of the most prominent, yet often overlooked, canvases for personal expression on this significant day is your graduation cap. Learning how to decorate grad cap isn't just about adding flair; it's about telling your story, celebrating your journey, and making a lasting visual statement that will be captured in countless photos and cherished memories.
Transforming your plain academic regalia into a personalized masterpiece is an exciting endeavor. Much like designing your home to reflect your personality, your grad cap offers an incredible opportunity to showcase your individuality, express gratitude, or even share a humorous inside joke. This guide will walk you through everything you need to know, from initial brainstorming to the final touches, ensuring your decorated grad cap stands out and perfectly encapsulates your unique graduation experience.
Table of Contents
- Understanding Your Grad Cap: The Canvas
- Brainstorming Your Grad Cap Theme: Personalizing Your Moment
- Popular Grad Cap Decoration Styles
- Step-by-Step Guide: How to Decorate Grad Cap with Confidence
- Advanced Techniques and Creative Touches
- Preserving Your Masterpiece: After Graduation
- Troubleshooting Common Grad Cap Decoration Challenges
- Inspiring Examples and Ideas from Fellow Graduates
Understanding Your Grad Cap: The Canvas
Before you dive into the exciting world of embellishments, it’s crucial to understand the basic structure of your grad cap. Most caps are made of stiff cardboard covered in fabric, typically polyester or rayon. They have a flat, square top with a button in the center from which the tassel hangs. This flat top is your primary canvas for decoration. Knowing its dimensions and material will help you choose appropriate decorations and adhesives.
Think of your grad cap as a small, personal billboard. Just as you'd plan, design, and decorate an apartment or office, you need a strategy for your cap. The goal is to achieve professional results without needing professional skills. This means understanding the limitations and possibilities of your chosen medium.
Essential Tools and Materials for Decoration
Having the right tools is half the battle when undertaking any creative project. For decorating your grad cap, here’s a list of essentials that will make the process smoother and ensure a polished finish:
- Adhesives: Fabric glue, hot glue gun (low-temp for delicate items), strong craft glue (e.g., E6000), double-sided tape, or adhesive spray. Choose based on the weight and type of materials you're attaching.
- Cutting Tools: Sharp scissors, craft knife (X-Acto knife) for precise cuts.
- Measuring Tools: Ruler, measuring tape for symmetry and proper placement.
- Pencils/Markers: For sketching designs or outlining before applying permanent elements.
- Protective Surface: Newspaper or a craft mat to protect your workspace from glue or paint.
- Gloves: If using spray paint or strong adhesives.
- Optional: Tweezers for placing small embellishments, a small paintbrush for glue, a lint roller to clean the cap surface.
Many of these items you might already have on hand, much like checking "what you have" before buying new home decor. This approach can save you time and money, allowing you to focus your budget on the fun decorative elements.
Safety First: What to Avoid
While creativity knows no bounds, there are a few practical considerations and safety tips when learning how to decorate grad cap:
- Don't Obstruct Vision: Ensure your decorations don't hang over the brim of the cap and block your sight. This is crucial for navigating the stage safely.
- Avoid Excessive Weight: Too many heavy embellishments can make the cap uncomfortable to wear, cause it to tilt, or even damage the cap's structure. Aim for a balanced design.
- Be Mindful of Glare: Highly reflective materials like large mirrors or excessive glitter might cause glare, especially under stage lights or bright sunlight, potentially affecting photos.
- Check University Rules: Some institutions have guidelines or restrictions on grad cap decorations (e.g., no offensive language, no political statements). Always check with your university's commencement office beforehand to avoid any last-minute issues.
- Non-Damaging Adhesives (if renting): If your cap is rented and needs to be returned, use adhesives that can be easily removed without damage, or consider decorating a separate piece of cardstock that can be attached to the cap with temporary adhesive.
Much like ensuring your home decor projects are safe and practical, applying these principles to your grad cap ensures a smooth and enjoyable graduation day.
Brainstorming Your Grad Cap Theme: Personalizing Your Moment
The first step in decorating your grad cap is deciding on a theme or message. This is where your personality truly shines. Think about what defines your journey, your aspirations, or your gratitude. Here are some popular themes to spark your inspiration:
- Academic Achievement: Highlight your major, GPA, or specific academic accomplishments. Think about symbols related to your field (e.g., DNA helix for biology, gears for engineering, books for literature).
- Future Aspirations: Showcase your next steps – a job, graduate school, travel plans, or a personal goal. Phrases like "Future [Your Profession]" or "Off to [City/Country]" are popular.
- Gratitude: Thank your family, friends, professors, or a specific mentor who supported you. "Thanks, Mom & Dad!" is a classic.
- Humor/Pop Culture: Inject some fun with a witty quote, a meme, or a reference to your favorite TV show, movie, or book.
- Personal Journey: Reflect on challenges overcome, growth achieved, or a specific quote that motivated you throughout your studies.
- School Spirit: Incorporate your university's colors, mascot, or motto.
- Hobbies/Interests: If you have a strong passion outside of academics, weave it into your design.
To help you get started, much like gathering the best home decor ideas straight from designers, consider what truly resonates with you. What story do you want your cap to tell? What do you want people to remember about your graduation?
Popular Grad Cap Decoration Styles
Just as there are endless ways to transform your home, whether your taste runs modern, contemporary, rustic, or eclectic, there are diverse styles for decorating your grad cap. Your chosen style will dictate the materials and techniques you use.
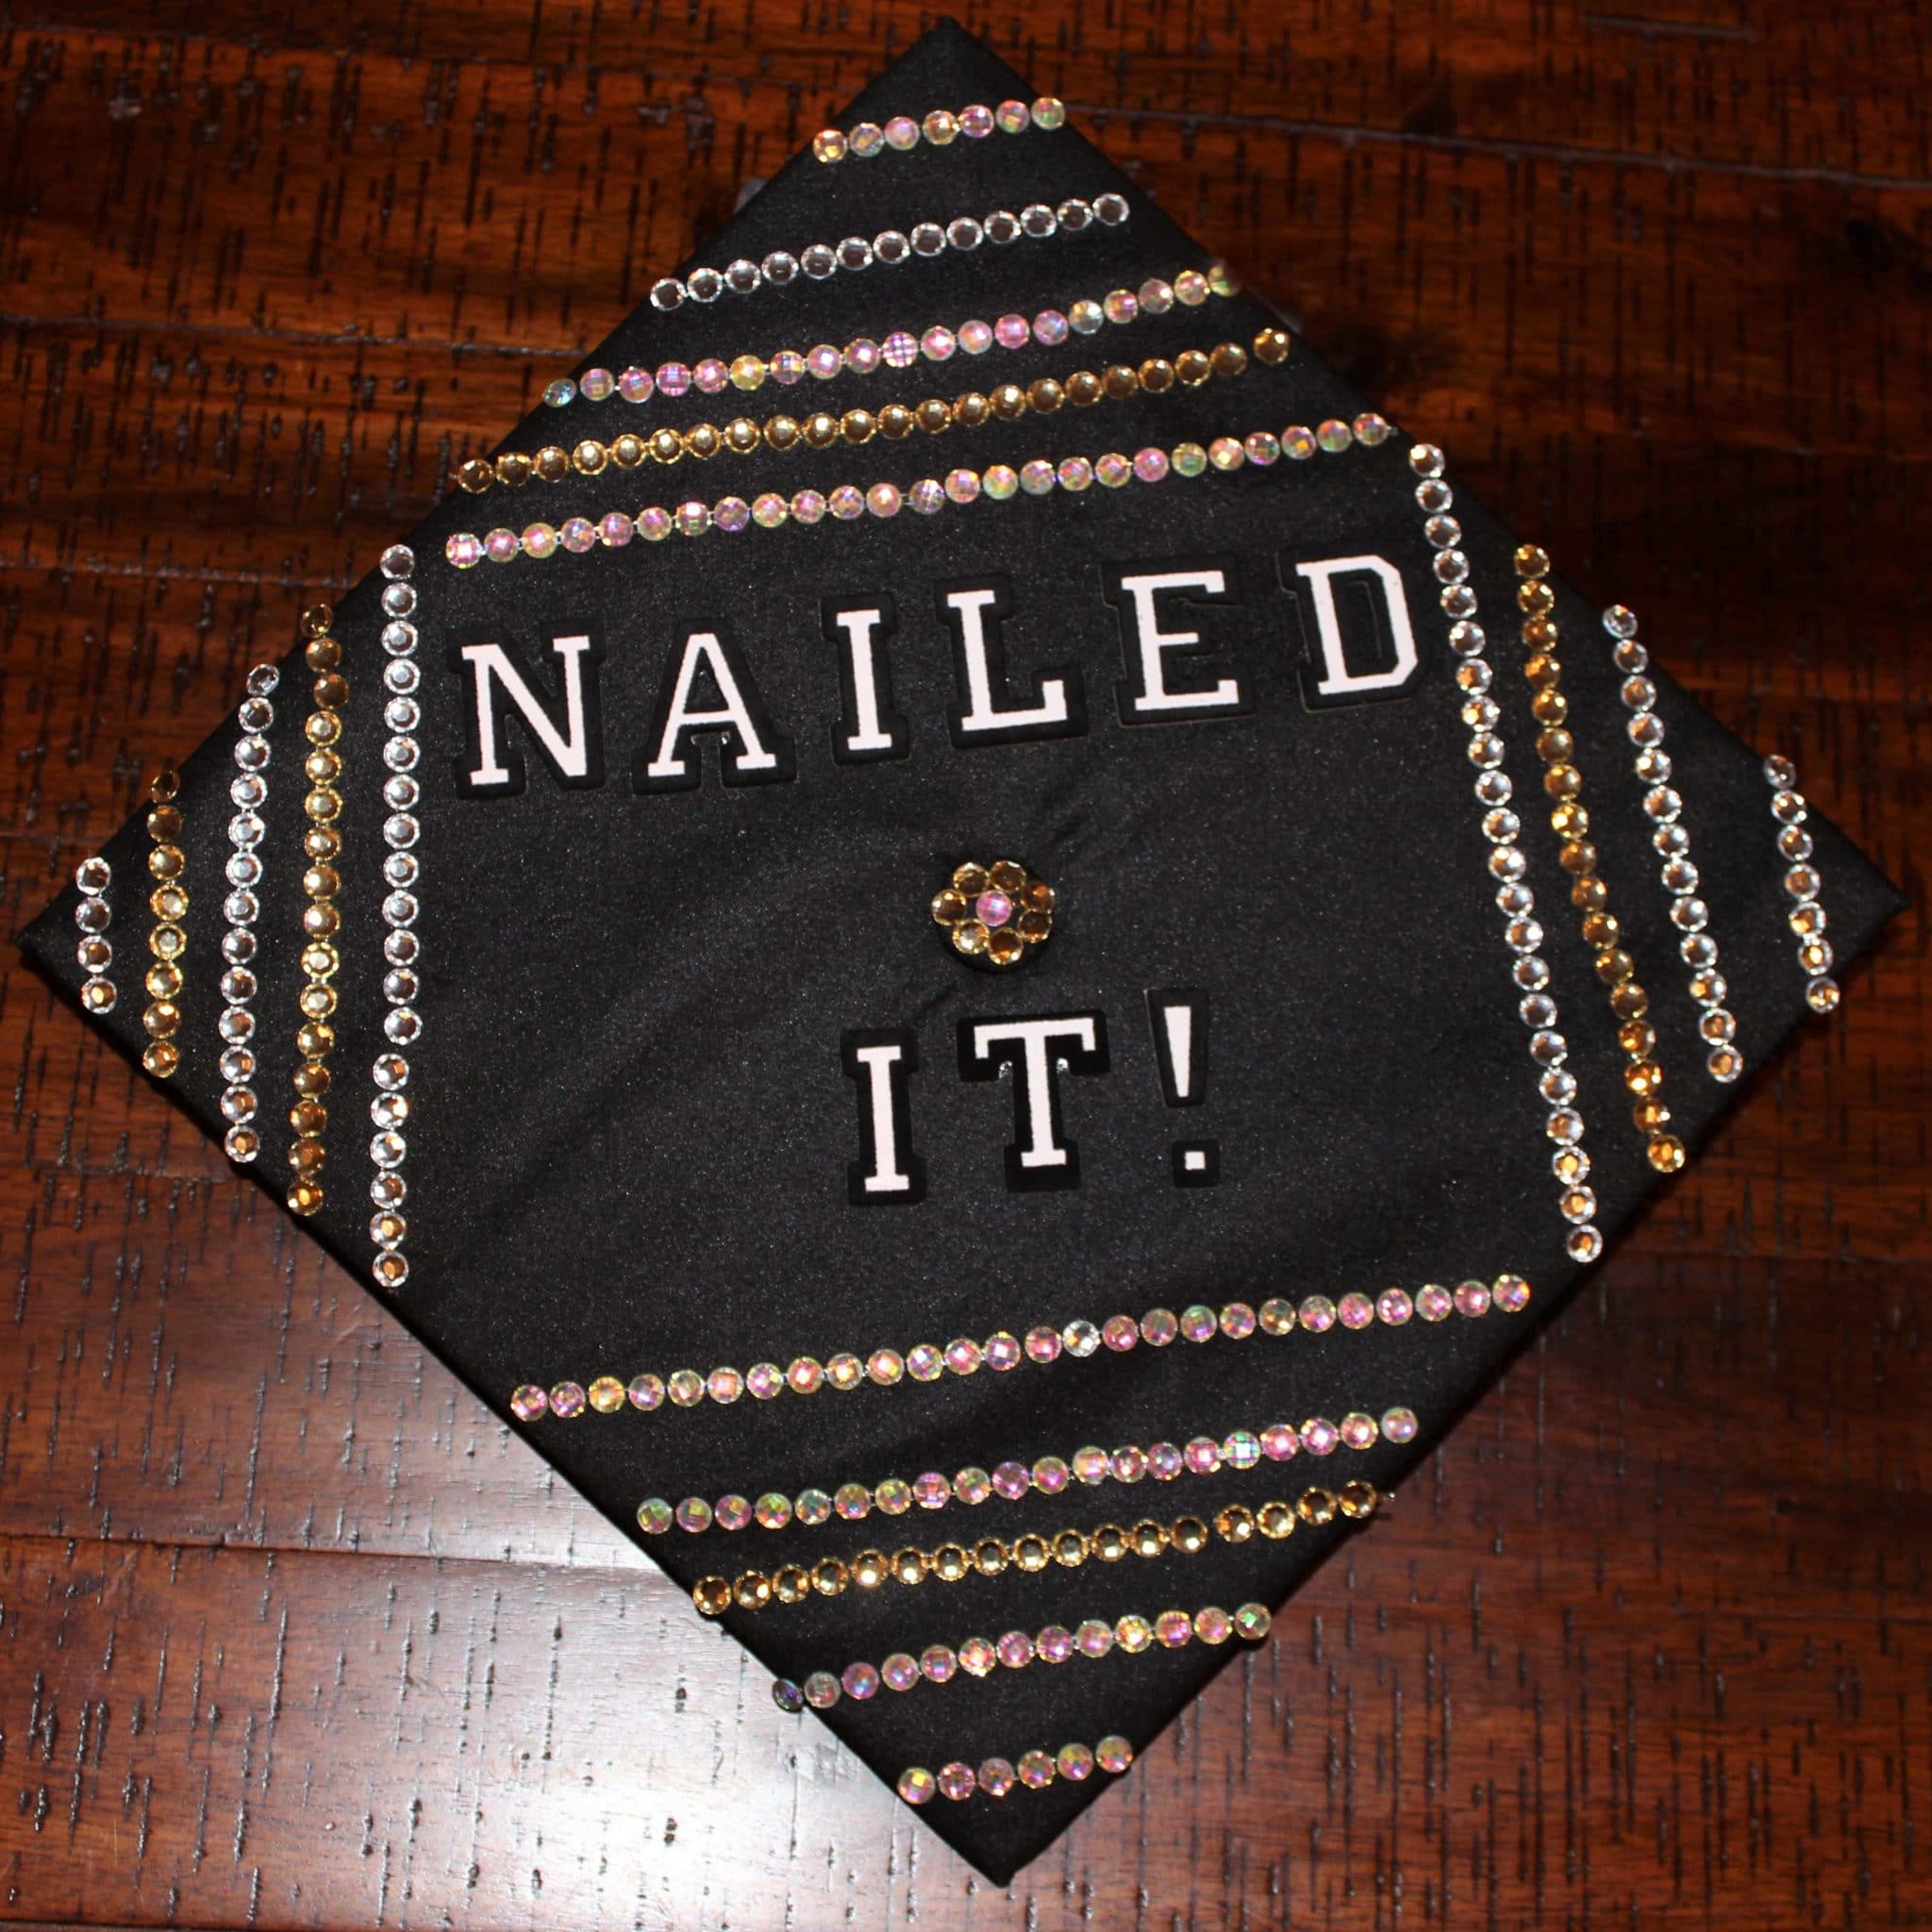
The Minimalist Approach: Less is More
For those who appreciate understated elegance, a minimalist design can be incredibly impactful. This style focuses on clean lines, limited color palettes, and a powerful, concise message. It's about making a statement without overwhelming the senses.
- Typography Focus: A beautifully lettered quote or a single word (e.g., "Done," "Finally," "Next Chapter") in a elegant font.
- Simple Graphics: A single, iconic symbol related to your major or future.
- Subtle Embellishments: A few strategically placed pearls, small rhinestones, or a thin ribbon border.
- Color Blocking: Using two or three contrasting or complementary colors in a geometric design.
Much like styling a simple boxwood wreath in three different ways, a minimalist grad cap can be versatile and timeless, perfect for those who prefer a refined aesthetic.
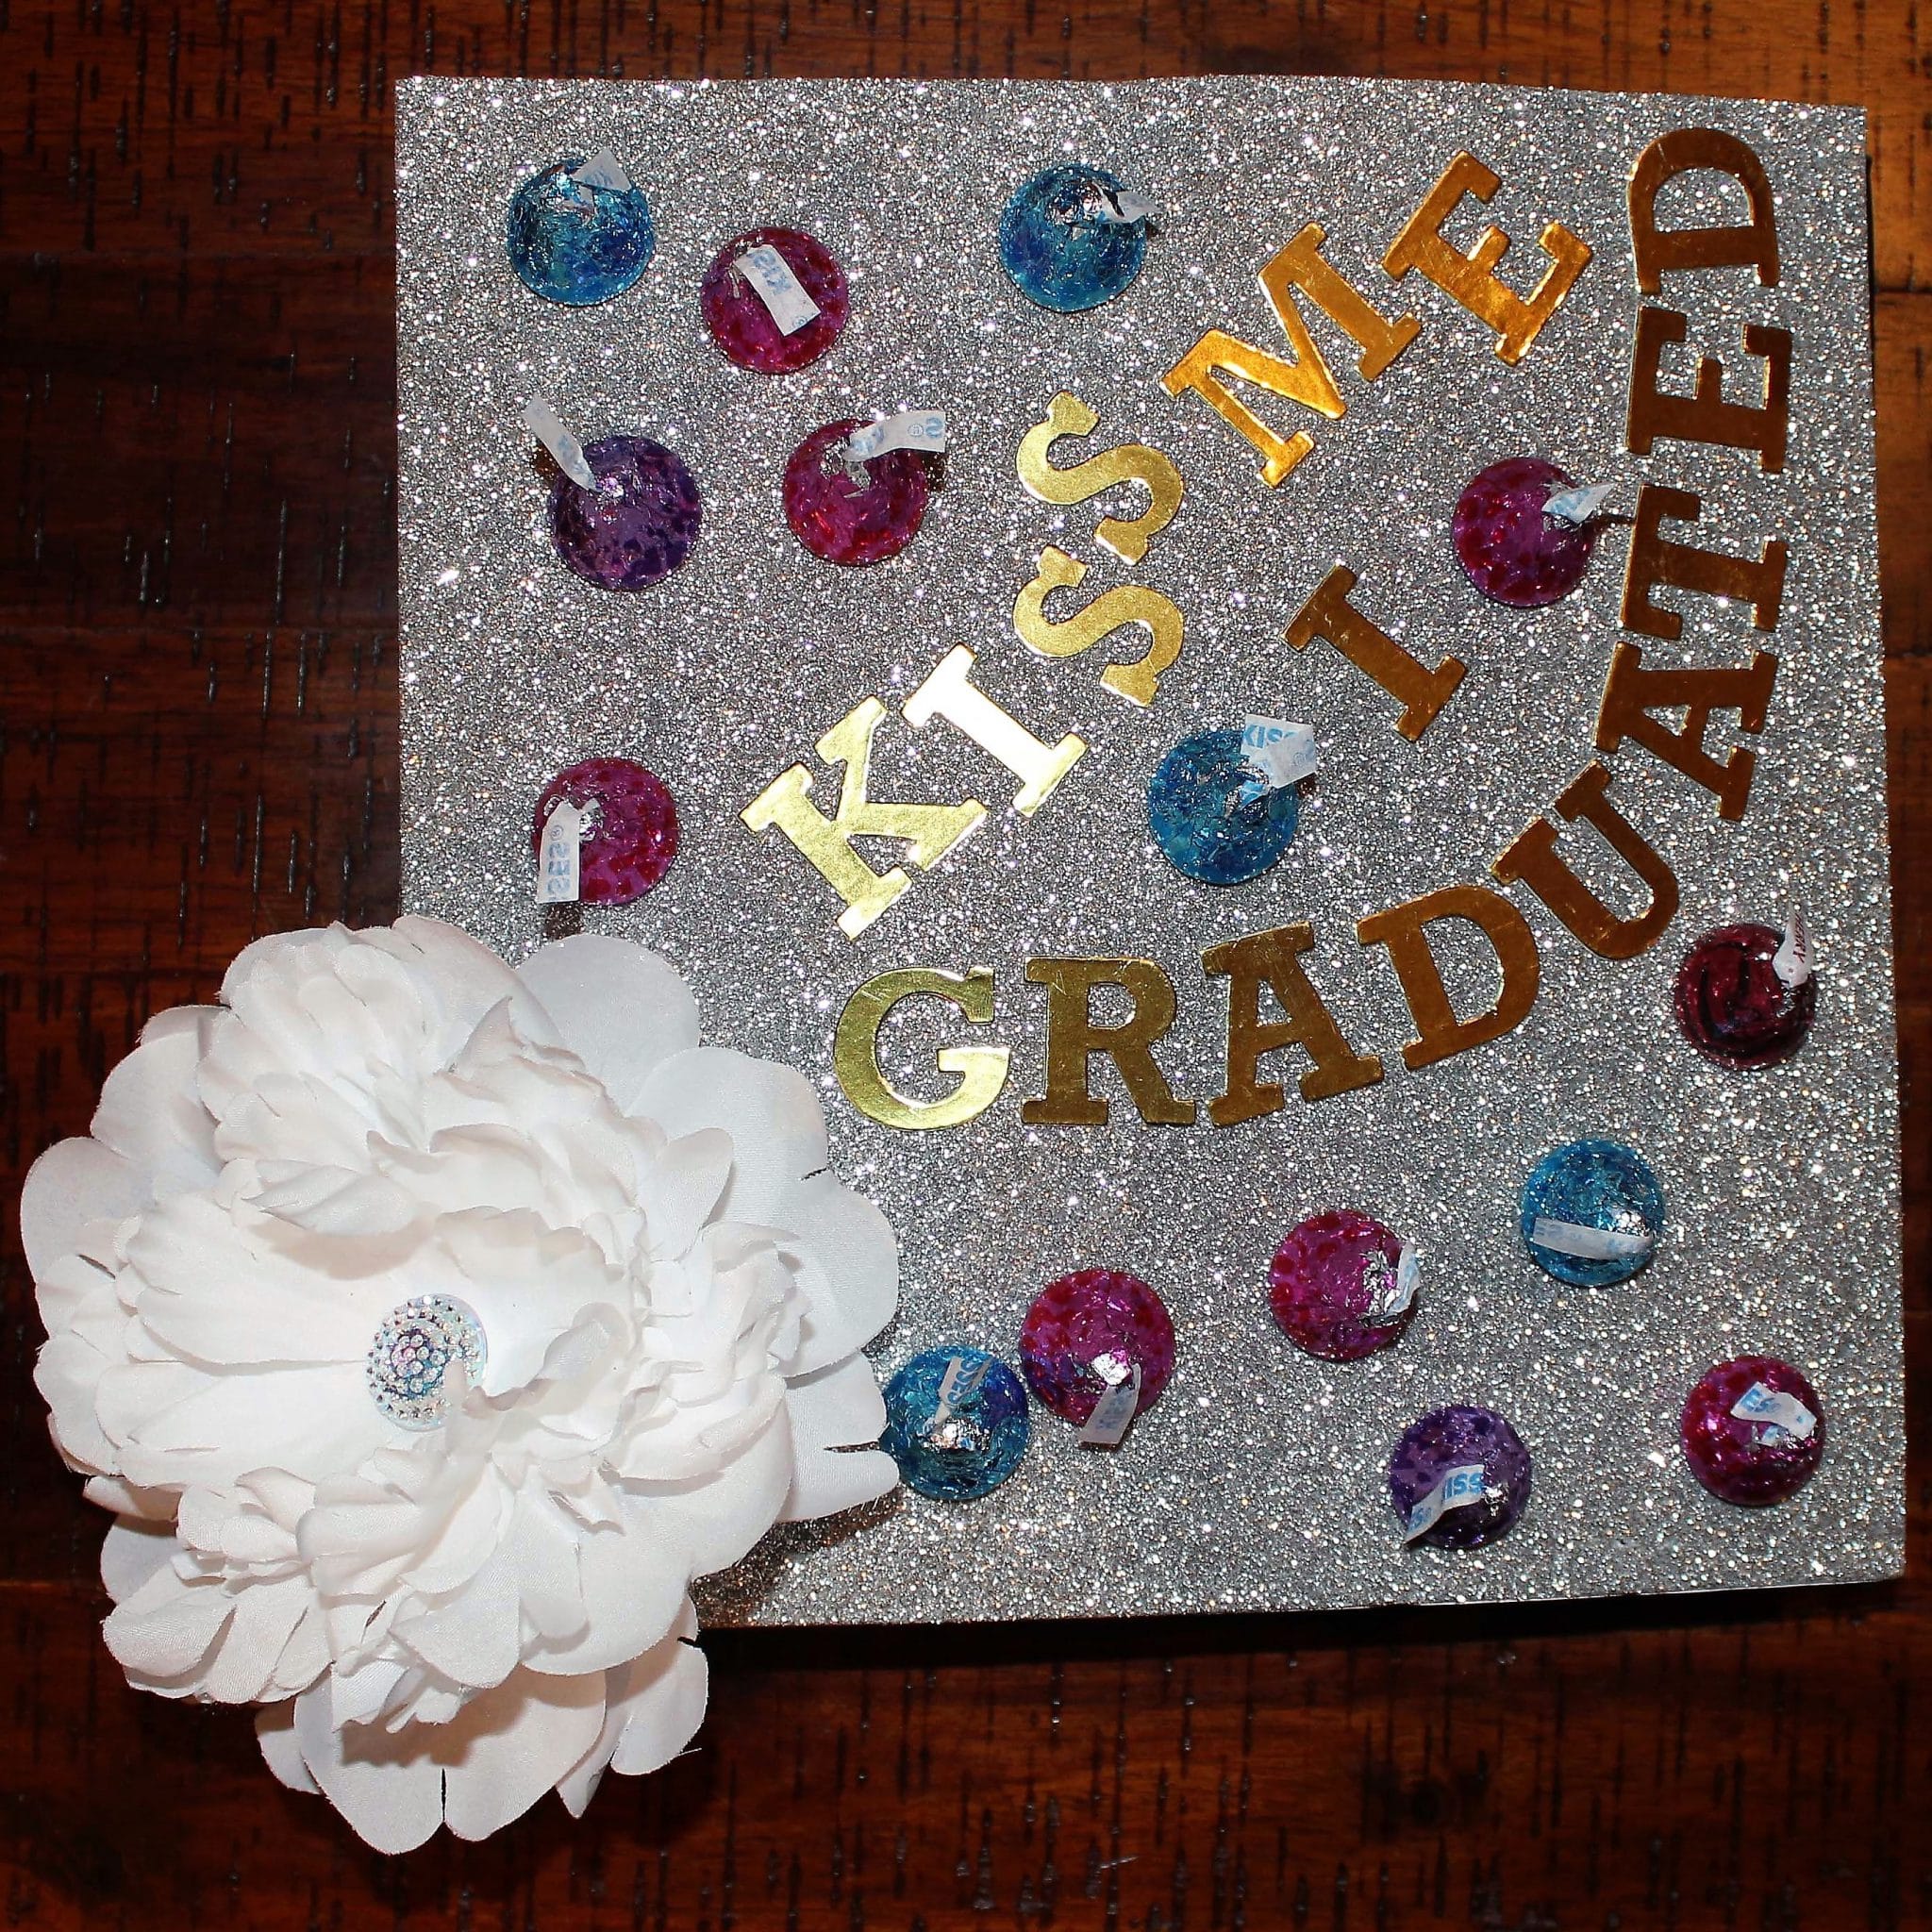
The Extravagant Statement: Go Big or Go Home
If your personality is vibrant and bold, an extravagant grad cap might be your calling. This style embraces maximalism, vibrant colors, and a rich array of textures and embellishments. It’s about creating a show-stopping piece that demands attention.
- 3D Elements: Artificial flowers, miniature objects (e.g., tiny books, globes, tools), small figurines, or layered paper cutouts.
- Full Coverage Glitter/Rhinestones: Completely covering the cap in shimmering materials for maximum sparkle.
- Intricate Murals/Paintings: A detailed hand-painted scene, a complex collage, or a portrait.
- LED Lights: Small battery-operated LED strings woven into the design for an illuminated effect (ensure they are lightweight and safely secured).
This approach allows for incredible creativity, transforming your cap into a true work of art. Remember, the goal is to get professional results without needing professional skills – just a willingness to experiment and have fun!
Step-by-Step Guide: How to Decorate Grad Cap with Confidence
Now that you have your theme and style in mind, let’s get down to the practical steps of decorating your grad cap. Following these steps will help ensure a smooth process and a fantastic result.
- Prepare Your Workspace: Lay down newspaper or a protective mat. Ensure good lighting and ventilation, especially if using spray adhesives or paints.
- Measure and Plan Your Design:
- Carefully measure the top of your cap. Most are 9.5 x 9.5 inches (approx. 24 x 24 cm).
- Consider the button in the center – will your design incorporate it, or will it be removed (if allowed and reattachable)?
- Sketch your design on a piece of paper the same size as your cap. This helps with placement, spacing, and color choices. Online-based software with intuitive interfaces can even help you plan and design virtually before you commit to materials.
- Choose Your Base:
- You can decorate directly on the cap fabric.
- Alternatively, cut a piece of cardstock or poster board to the exact size of your cap, decorate it, and then attach it to the cap. This is especially useful if you want to use paint or if your cap is rented. Cut a small hole in the center for the tassel button.
- Apply Your Base Layer (if any):
- If painting the entire cap or your cardstock base, apply an even coat. Use fabric paint for direct cap decoration or acrylic paint for cardstock. Allow to dry completely.
- If using glitter, apply a layer of glue and sprinkle glitter evenly. Press down gently for good adhesion.
- Add Main Elements:
- If using vinyl decals, apply them carefully, smoothing out bubbles.
- For hand-lettering or drawing, use fabric markers or paint pens. Outline lightly with pencil first.
- Attach larger paper cutouts or fabric pieces with appropriate adhesive.
- Incorporate Details and Embellishments:
- This is where you add rhinestones, pearls, small artificial flowers, ribbons, or other decorative elements.
- Use tweezers for precise placement of small items.
- Apply glue sparingly to avoid visible residue.
- Allow for Drying Time: This is critical! Give all adhesives and paints ample time to dry completely, ideally overnight, before handling or wearing the cap. Rushing this step can lead to smudges or items falling off.
- Test Fit: Once dry, try on your cap to ensure it's comfortable and your design doesn't obstruct your vision. Make any minor adjustments if necessary.
These decorating tips provide actionable ideas you can use to decorate your cap. Remember, decorating like a designer doesn’t have to be hard; there are many tips and tricks you can follow to help you transform your cap into a statement piece.
Advanced Techniques and Creative Touches
For those looking to push the boundaries beyond basic applications, here are some advanced techniques and creative touches to consider when you **decorate grad cap**:
- Layering: Create depth by layering different materials. For example, a base of glitter, topped with a vinyl decal, and then accented with 3D flowers. This adds texture and visual interest.
- Fabric Manipulation: Gather, pleat, or fold fabric to create ruffles, bows, or other sculptural elements. Secure with fabric glue or hot glue.
- Embroidery or Stitching: If you have sewing skills, embroidering a design directly onto the cap (if the fabric allows) or onto a fabric overlay can create a beautiful, handcrafted look.
- LED Lights: Small, battery-operated LED string lights can add a magical glow, especially for evening ceremonies or photos. Secure the battery pack discreetly on the underside of the cap.
- Resin Coating: For a durable, glossy finish, consider applying a thin layer of clear resin over flat designs. This protects the design and gives it a professional, polished look. Ensure proper ventilation and follow product instructions.
- Mixed Media: Don't limit yourself to one type of material. Combine paint, paper, fabric, and found objects to create a truly unique piece. This eclectic approach can lead to stunning results, much like combining different styles in home decor.
We've consulted several designers who shared that the key to achieving professional results is often in the details and the willingness to experiment with different textures and dimensions. Just like exploring kitchen design styles or color palettes, exploring different materials for your grad cap can unlock incredible potential.
Preserving Your Masterpiece: After Graduation
Your decorated grad cap is more than just an accessory; it's a memento of a significant life event. After the ceremony, you'll want to preserve your masterpiece so you can cherish it for years to come. Here's how:
- Handle with Care: Avoid bending or crushing the cap. Hold it by the brim or the sides rather than the decorated top.
- Display It: Consider displaying your cap in a shadow box or a clear acrylic display case. This protects it from dust and damage while allowing you to admire your creation. You can add other graduation mementos like your tassel, cords, or a photo.
- Store Properly: If not displaying, store your cap in a sturdy box in a cool, dry place away from direct sunlight. Sunlight can fade colors and degrade materials over time. Placing acid-free tissue paper around it can also help protect it.
- Photograph It: Take high-quality photos of your cap from various angles before and after the ceremony. These photos will serve as a lasting record, even if the physical cap eventually shows signs of wear.
Much like preserving family heirlooms or special home decor items, a little care goes a long way in ensuring your grad cap remains a cherished keepsake.
Troubleshooting Common Grad Cap Decoration Challenges
Even with careful planning, sometimes things don't go exactly as expected. Here are some common challenges you might encounter when learning how to decorate grad cap, and how to address them:
- Adhesive Not Holding:
- Issue: Embellishments falling off.
- Solution: Ensure you're using the right adhesive for your materials. Heavy items need strong glue (e.g., E6000 or hot glue). Ensure surfaces are clean and dry before application. Allow adequate drying time.
- Smudged Paint/Ink:
- Issue: Accidental smudges during application.
- Solution: Work slowly and allow each layer to dry completely before adding more. If a smudge occurs, try to gently scrape it off with a craft knife if dry, or dab with a damp cloth if wet (test on an inconspicuous area first). Prevention is key.
- Uneven Placement:
- Issue: Design elements are crooked or off-center.
- Solution: Use a ruler and pencil to mark guidelines before applying anything permanently. For lettering, lightly sketch the words first. Step back frequently to assess symmetry.
- Cap Feeling Too Heavy/Uncomfortable:
- Issue: The cap is weighing down your head.
- Solution: If possible, remove some of the heavier 3D elements. Next time, opt for lighter materials like paper cutouts, fabric, or sequins instead of large, dense objects.
- Design Doesn't Look Like the Plan:
- Issue: The final product doesn't match your initial vision.
- Solution: Sometimes, creative projects evolve. Embrace the unexpected! If you're truly unhappy, and if you decorated on a separate cardstock piece, you can always start over. If not, try to add small elements to "fix" or distract from the areas you don't like.
Decorating a home can be daunting, and so can decorating a grad cap for the first time. But with these clever solutions to common problems, you're well-equipped to tackle any hurdle and achieve your dream cap.
Inspiring Examples and Ideas from Fellow Graduates
The beauty of grad cap decoration lies in its infinite possibilities. Looking at what others have created can provide a fantastic spark for your own design. From the pages of various design inspirations, we can gather countless practical and fun ideas to make your dream cap from whatever you have. Here are some popular themes and how they translate into cap designs:
- The "Up" House: Many graduates adorn their caps with the iconic house from Disney's "Up," complete with balloons, symbolizing the start of a new adventure. This often involves 3D elements and vibrant colors.
- "The Tassel Was Worth the Hassle": A classic, simple, and effective phrase, often accompanied by glitter or a minimalist design.
- Major-Specific Designs:
- Nursing: Stethoscopes, caduceus symbols, or phrases like "Future RN."
- Education: Apples, books, "Future Teacher" slogans, or even a tiny chalkboard.
- Engineering: Gears, circuit boards, or a blueprint-style design.
- Arts: Paintbrushes, music notes, theater masks, or abstract designs.
- Pop Culture References: Quotes from Harry Potter ("Mischief Managed"), Star Wars ("May the Fourth Be With You," "The Force is Strong with This One"), or even popular memes.
- Nature/Floral Themes: Beautiful floral arrangements, leaves, or even miniature landscapes. These often use artificial flowers, greenery, and sometimes even small battery-operated fairy lights.
- Travel/Adventure: Maps, globes, airplanes, or phrases like "Adventure Awaits."
Whether you're looking for decorating ideas or trendy paint colors for your cap, you've come to the right place. The key is to find something that genuinely reflects your journey and excitement for the future. Remember, your cap is a personal statement, a visual celebration of your accomplishment. Get inspired, be creative, and most importantly, have fun with the process!
Learning how to decorate grad cap is more than just a craft project; it's an opportunity to infuse your personality into one of life's most significant moments. From meticulous planning to the final flourish, every step allows you to celebrate your unique journey and express gratitude or excitement for what lies ahead. Your cap becomes a cherished keepsake, a tangible reminder of your hard-earned achievement.
We hope this comprehensive guide has provided you with the inspiration and practical advice you need to create a truly unforgettable grad cap. Now it's your turn to unleash your creativity! What theme will you choose? What materials will you use? Share your ideas and finished masterpieces with us in the comments below, or tag us on social media. And if you're looking for more ways to personalize your celebration, explore our other articles on graduation party planning and unique gift ideas!