Do you ever look at intricate body art and think, "I could never do that"? Well, when it comes to beautiful henna designs, that simply isn't true. You absolutely don't have to be a professional artist to create something lovely and personal. In fact, getting started with easy henna is much simpler than you might imagine, opening up a world of temporary self-expression for anyone who wants to try it.
For a long time, maybe you thought henna was just for big celebrations or required years of practice. That's a common thought, but it's not the whole story. Just like you don't have to be a pro baker to make a delicious treat, you don't need years of training to enjoy creating with henna. There are so many simple designs and straightforward ways to get started, whether you're looking for a quick artistic touch or something a bit more elaborate for a special day. It's truly a fun, accessible art form.
Right now, people are finding joy in all sorts of simple, creative projects at home. Henna fits perfectly into this trend. It offers a wonderful way to add a bit of beauty and tradition to your everyday life, or to prepare for a celebration, without feeling overwhelmed. We're going to explore how anyone can enjoy this ancient art, focusing on straightforward methods and patterns that look fantastic, yet are very easy to achieve. You know, it's about making art approachable.
Table of Contents
- What is Henna, Anyway?
- Why Choose Easy Henna?
- Making Your Own Easy Henna Paste
- Simple Henna Designs for Beginners
- Tips for Applying Easy Henna
- Caring for Your Easy Henna Art
- Frequently Asked Questions About Easy Henna
What is Henna, Anyway?
Coming from a South Asian tradition, henna uses a paste made from the powdered leaves of the henna plant to create a temporary tattoo. This plant, you know, has been a part of human history for a very long time. Henna has been used for thousands of years in South Asia, the Middle East, and Africa. People used it for its cooling properties, and also for decorative purposes. It's really quite a versatile plant, apparently.
Historically, henna is used to adorn the hands and feet of women and girls, especially during celebrations like weddings and festivals. Traditional henna is often drawn in delicate, intricate patterns. However, that's just one way to use it. The core idea is simply applying the paste to the skin to leave a temporary stain, which fades over time. It's more or less a natural way to decorate your body.
Why Choose Easy Henna?
Choosing easy henna means you get to enjoy the beauty and tradition of this art form without feeling intimidated. It's perfect for beginners. You see, the whole point is to make it accessible. Simple henna ideas offer elegance with quick designs. You can explore henna for beginners, featuring minimalistic art and patterns. This approach makes it possible for anyone to create stunning henna art with ease, as a matter of fact.
Easy henna is also fantastic because it's temporary. You can try different designs, experiment with placements, and then simply let it fade away. This means no long-term commitment, which is great for trying out new looks or just having fun. It's kind of like trying out new recipes; if you don't like it, you can always try something else next time. Plus, it's a very affordable way to add a unique touch to your look, honestly.
Making Your Own Easy Henna Paste
One of the best ways to ensure your henna is easy and safe is to make your own paste. This way, you know exactly what goes into it. We have a simple, foolproof recipe on how to make your own henna at home. It's a very satisfying process, actually, and gives you full control over the quality. You can learn how to make henna with just a few ingredients.
Ingredients for Your Simple Henna Mix
- Henna powder: Make sure it's 100% pure body art quality henna powder. This is crucial for a good stain and safety.
- Lemon juice or strong black tea: These acidic liquids help release the dye from the henna powder. Lemon juice is a common choice, but tea works well too, you know.
- Essential oils: Lavender, tea tree, or cajeput oil are good options. These oils help deepen the stain and improve the texture of the paste. Just a few drops will do.
- Sugar: A little sugar helps the paste stick to the skin better and keeps it from flaking off too quickly. This helps the dye soak in longer, apparently.
Steps to Create Your Paste
- Measure Your Henna: Start with about 1/4 cup of good quality henna powder in a glass bowl.
- Add Acidic Liquid: Slowly add your lemon juice or tea, stirring constantly. You want to reach a consistency similar to mashed potatoes, so it's a bit thick.
- Mix in Essential Oil and Sugar: Add a teaspoon of your chosen essential oil and a teaspoon of sugar. Mix it all together really well.
- Dye Release: Cover the bowl with plastic wrap, pressing it directly onto the surface of the paste to prevent a crust from forming. Let it sit in a warm place for several hours, typically 6-12 hours. This time allows the dye to release. You'll know it's ready when you see a darker, reddish-brown puddle on top of the paste when you scratch it with a spoon.
- Thin if Needed: Once the dye is released, you might need to add a few more drops of lemon juice or tea to get a smooth, toothpaste-like consistency. It needs to be thin enough to flow from a cone, but not so thin that it runs. This step is pretty important, you know.
- Strain (Optional but Recommended): For a truly smooth paste that won't clog your applicator, push the paste through a nylon stocking or a fine sieve. This removes any lumps.
- Load Your Cone: Carefully spoon your prepared paste into an empty henna cone or a small piping bag. Seal the top. Your easy henna paste is ready to use!
Simple Henna Designs for Beginners
Discover easy henna designs for beginners and start creating beautiful henna art today. There are so many options that don't require a steady hand or years of practice. You can learn tips and tricks, explore simple patterns, and make something lovely. It's about finding what feels good and what you can achieve with a little practice, honestly.
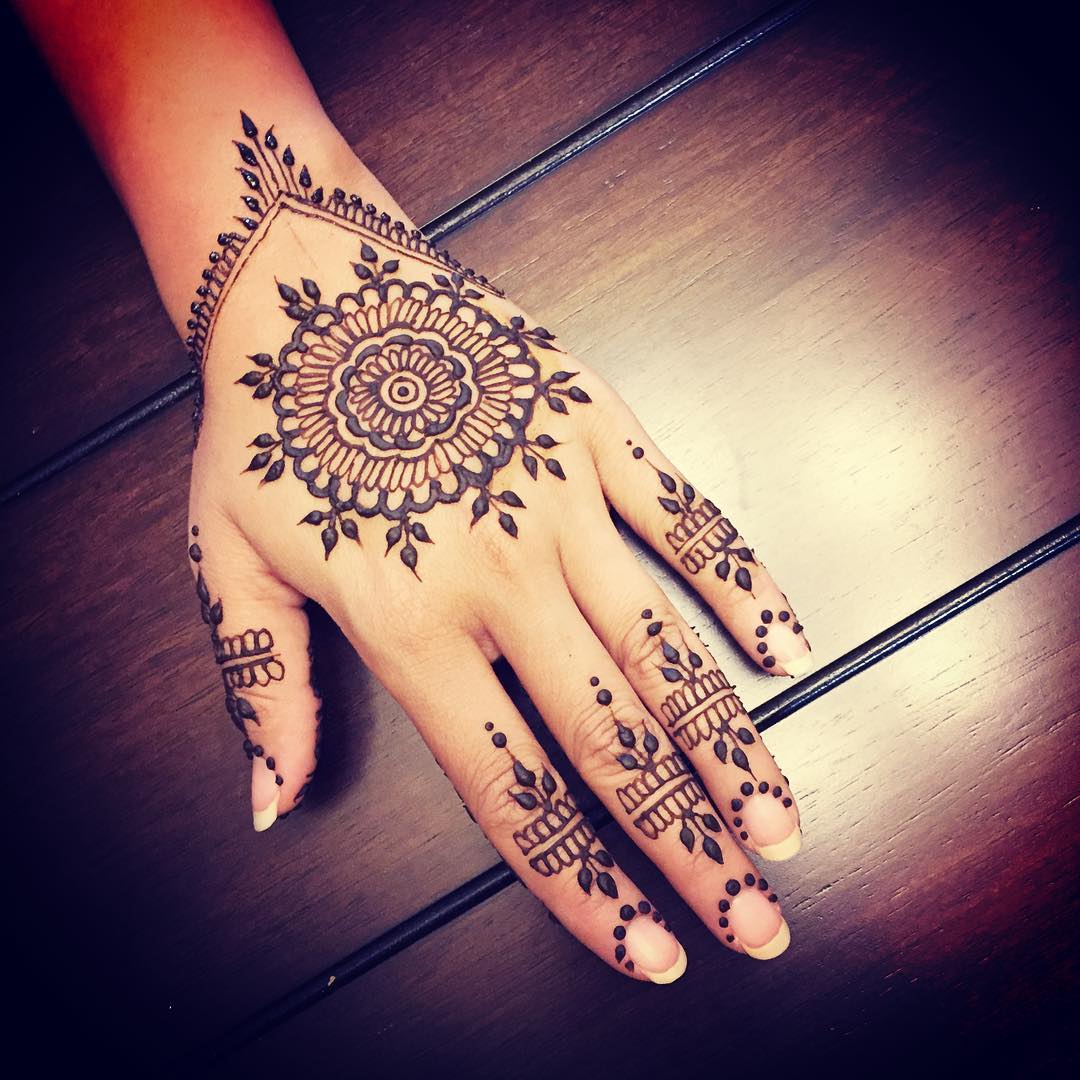
Palm Perfection: Easy Designs for Your Hand
Palm henna designs are a popular choice for beginners and those who want a quick yet beautiful look. Since the palm provides a wide, flat surface, it’s ideal for easy henna designs. This makes it much simpler to draw without worrying about curves or small spaces. You can create a central motif and expand from there, or just fill the space with simple shapes. For instance, a basic flower or a circular mandala can look really stunning here. It's a very forgiving area to work on, you know.
- Simple Mandala: Draw a small circle in the center of your palm, then add layers of dots, petals, or scallops around it. This is a classic and always looks good.
- Heart Shaped Mehndi: A simple heart outline, perhaps filled with small dots or lines, makes for a sweet and easy design.
- Basic Floral: Start with a simple five-petal flower and add a few leaves. You can repeat this pattern across the palm.
- Abstract Swirls: Just let your hand move! Create gentle, flowing lines and swirls. These look artistic and are super easy to do.
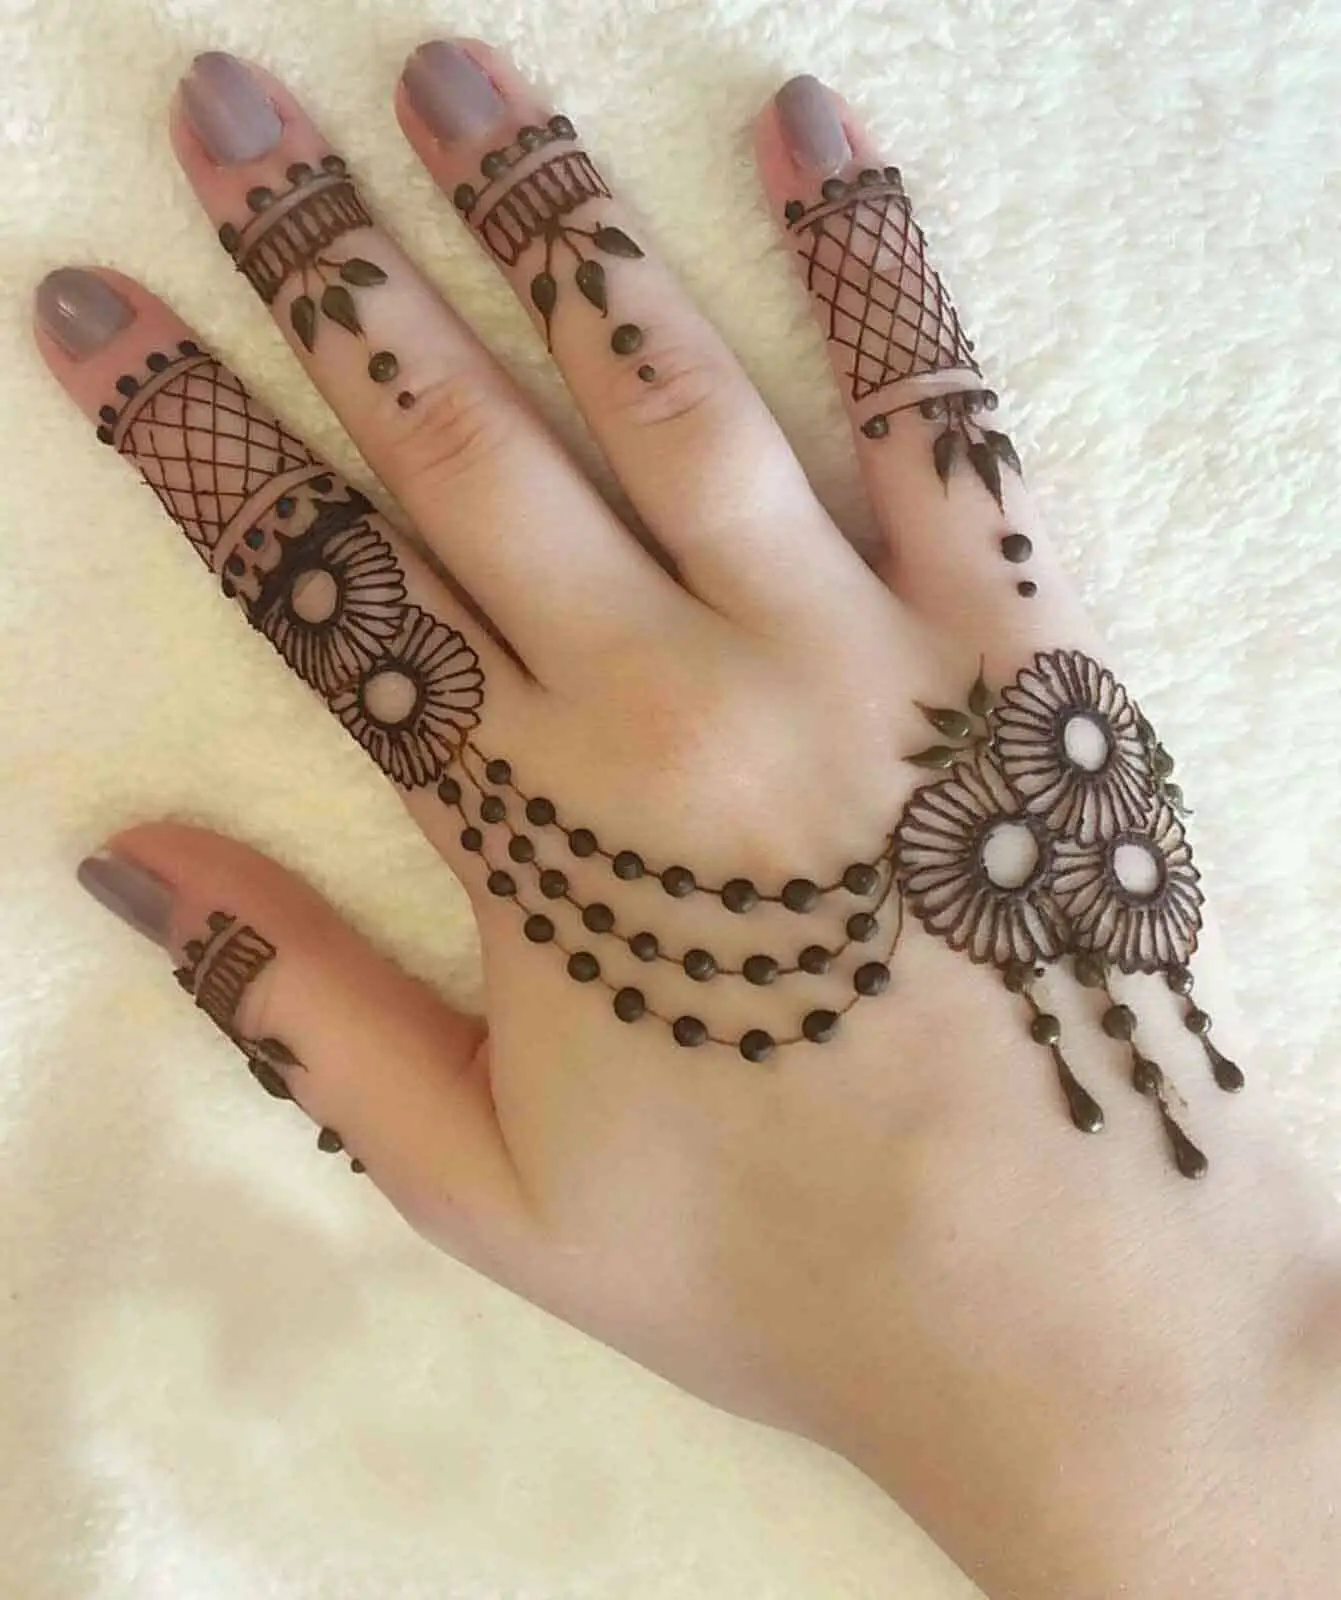
Finger Focus: Quick and Charming Patterns
Don't forget your fingers! Finger henna designs can be incredibly simple yet add a lot to your overall look. These are quick to apply and can be done even if you're short on time. You know, sometimes just a little bit of something makes a big difference. They are perfect for a subtle touch of elegance, or to complement a larger palm design. Just a little bit of effort, and it looks great.
- Single Dot with Tail: A dot on the fingertip with a line extending down the finger. Very simple, yet effective.
- Simple Bands: Draw a thin band around the finger, perhaps with tiny dots above or below it.
- Leaf Designs: Small, stylized leaves drawn along the side of a finger. These are surprisingly easy to master.
- Geometric Shapes: Little triangles or squares repeated along the finger can create a modern look.
Minimalistic Magic: Less is More
Nowadays, people are more into minimalistic mehndi trends. Simple henna ideas offer elegance with easy and quick designs. Explore henna for beginners featuring minimalistic art and patterns! These designs prove you don't need a lot of detail to make a statement. They are clean, modern, and very chic. It's kind of like how a single, perfect accessory can complete an outfit, you know?
- Single Line Art: A single, flowing line that perhaps creates a simple shape or abstract pattern on the back of the hand or wrist.
- Small Clusters of Dots: A few dots grouped together in an interesting arrangement. This is super easy and looks very delicate.
- Tiny Stars or Crescents: Small, simple shapes placed strategically.
- Feather Designs: A simple feather outline with a few lines inside. These are quite popular and look very graceful.
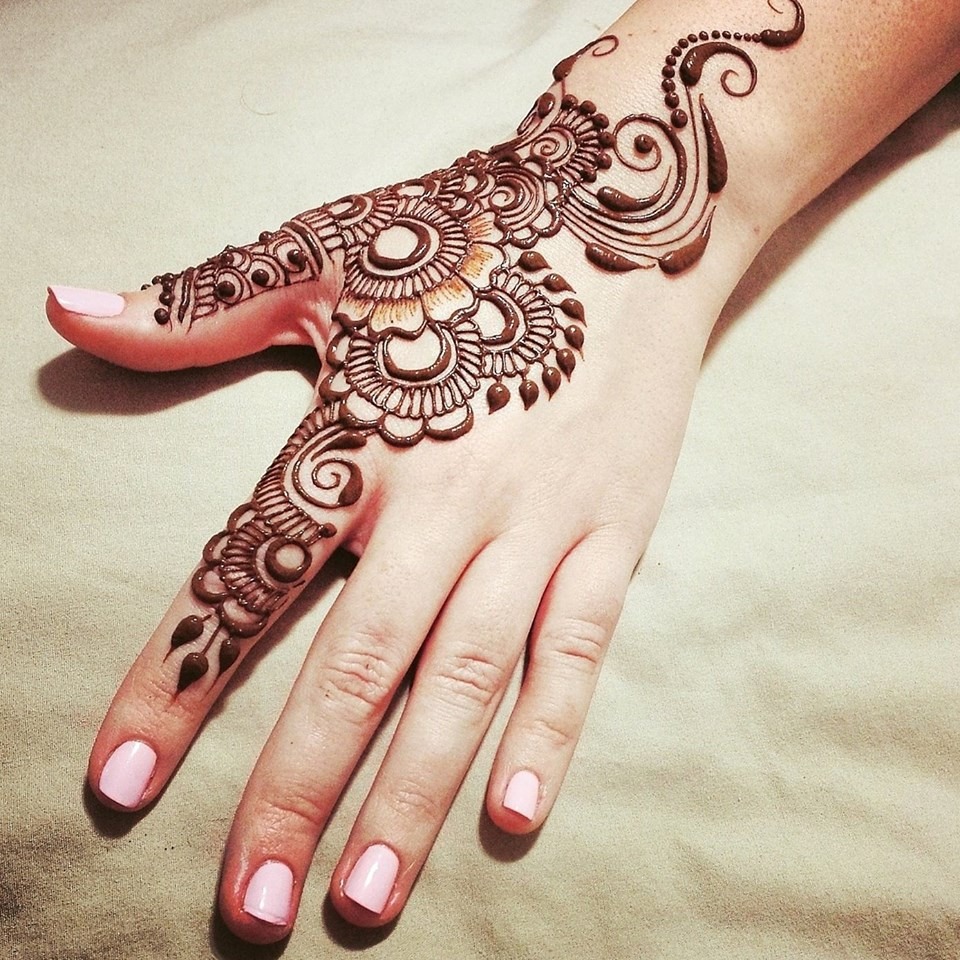
Classic and Contemporary Twists
You can also check out the best easy henna designs which include full hand easy henna, heart shaped mehndi designs, contemporary, classic, traditional henna designs, mandala henna, and flower patterns. Even traditional styles can be simplified for beginners. It's about breaking down complex patterns into manageable parts. So, you know, you can get that traditional feel without all the fuss.
- Simplified Arabic Mehndi: Arabic designs often feature bold lines and large floral patterns. For an easy version, pick one large flower or leaf motif and repeat it, or just draw one prominent vine.
- Basic Floral Trails: A simple vine with leaves and small flowers winding up the back of the hand or arm.
- "Bracelet" Designs: A simple band around the wrist, perhaps with a few hanging elements like teardrops or dots. This gives the look of jewelry.
Tips for Applying Easy Henna
Creating stunning henna art with ease is possible with a few simple tips. These tricks will help you get a cleaner design and a better stain, especially if you're just starting out. It's really about preparation and a little bit of patience, you know. Think of it like getting ready to cook; a little prep makes everything smoother.
- Clean Skin: Make sure your skin is clean and free of any lotions or oils. This helps the henna stick better and the dye soak in.
- Practice on Paper: Before applying to skin, practice your designs on a piece of paper. This helps you get a feel for the cone and the consistency of the paste. It's a bit like sketching before painting, you know.
- Start Simple: Don't try to do a full bridal design on your first go. Begin with single elements like dots, lines, or simple flowers. Build your confidence.
- Use a Good Cone: A well-rolled henna cone with a small, consistent opening is key for smooth lines. You can buy pre-made cones or roll your own.
- Work in Sections: If you're doing a slightly larger design, work in small sections. This prevents smudging and allows you to focus.
- Keep Hydrated: A little bit of sugar-lemon mixture dabbed on the drying henna can help keep it moist and allow for a darker stain.
Caring for Your Easy Henna Art
Once you've applied your easy henna design, proper care helps ensure a beautiful, long-lasting stain. The paste needs time to dry and for the dye to soak into your skin. This part is pretty important for the final look, you know.
- Let it Dry: Allow the henna paste to dry completely. This can take anywhere from 30 minutes to a few hours, depending on the thickness.
- Keep it On: For the best stain, leave the dried paste on your skin for as long as possible, ideally 6-12 hours, or even overnight. Some people wrap the area gently with medical tape or a soft cloth to keep it in place while sleeping.
- Scrape, Don't Wash: Once the paste is dry and has been on for enough time, gently scrape it off with a dull knife or your fingernail. Do not wash it off with water immediately.
- Avoid Water: Try to avoid water on the design for the first 24 hours after removing the paste. This helps the stain darken.
- Moisturize: After the initial 24 hours, you can moisturize your henna with natural oils like olive oil or coconut oil. This helps protect the stain and keep your skin hydrated.
- Heat Helps: Some people find that gentle heat (like from a warm, dry compress) can help darken the stain.
Frequently Asked Questions About Easy Henna
People often have questions when they're just starting out with henna. Here are some common ones that come up, especially about easy henna.
Is easy henna safe for beginners?
Yes, easy henna is generally safe for beginners, provided you use pure, natural henna powder. The main thing to watch out for is "black henna," which often contains a chemical called PPD (paraphenylenediamine) that can cause severe allergic reactions and permanent scarring. Always use natural henna powder and do a patch test on a small area of skin first, especially if you have sensitive skin. It's a very good idea to be cautious, you know.
What ingredients do I need for easy henna?
For easy henna paste, you'll need just a few simple things: pure henna powder, an acidic liquid like lemon juice or strong black tea, and essential oils such as lavender or tea tree oil. A little sugar helps too. You can find these ingredients at most health food stores or online. It's pretty straightforward to gather them, actually.
How long does easy henna last?
A well-applied easy henna design typically lasts anywhere from one to three weeks. The exact duration depends on several factors: the quality of the henna paste, how long you left the paste on, your skin type, and how often the area is washed or exfoliated. Designs on the palms and soles of the feet tend to stain darkest and last longest because the skin there is thicker. So, it varies a bit, you know.
Easy henna truly opens up the world of this beautiful, ancient art form to everyone. Whether you're trying a simple dot, a graceful swirl, or a charming floral pattern, the satisfaction of creating something lovely with your own hands is immense. It's a wonderful way to express yourself, connect with a rich tradition, and simply have a bit of creative fun. So, you know, why not give it a go?
You can find more ideas and inspiration for simple designs by checking out simple henna designs on Google Images. Learn more about henna art on our site, and link to this page beginner henna tips for even more guidance.